Builder’s Skybox
Overview
- Teleports you up to 750m into the sky and pieces together a large 30m² skybox around you in under 3 seconds.
- Removes the skybox and returns you to ground just as easily.
- 100% menu-driven with full context help and two-way navigation.
- Perfect for building in privacy.
- High precision textures with measurement and axis markers. Native white, blue, green and transparent texture options with grid on/off and markings on/off options. The green option automatically optimizes the setup for use as a greenscreen.
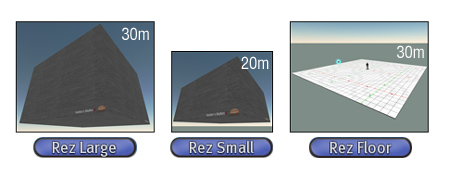
- Select from small skybox, large skybox and platform.
- Options persist. A skybox is constructed using settings from the previous session.
- Automatic options. Have various skyboxes in your inventory for different purposes, and rez any without having to customize via the menu everytime. Simply place on ground, click it, and you’ll be immediately teleported to the pre-selected height and the prefered skybox/platform created, and wall/floor textures automatically reapplied, all without any menu-interaction.
- Menu options to brighten walls and remove grid lines/markings. Great for a photo studio.
- Low lag. Five scripts handle all the customization of the large skybox for the 42 prims/5 objects involved.
- Avoid other sky structures. The “Panorama” menu option rotates you around 360 degrees before you decide to assemble at a given height.
Getting Started
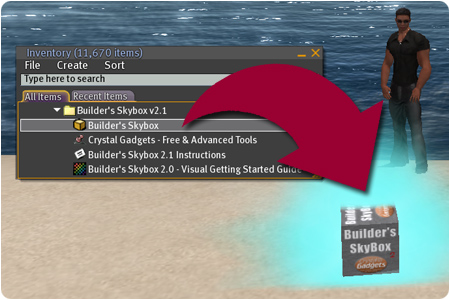
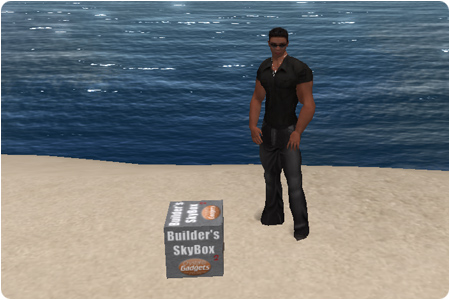
- Step 1:Drag the “Builder’s Skybox” object from your inventory to the ground.
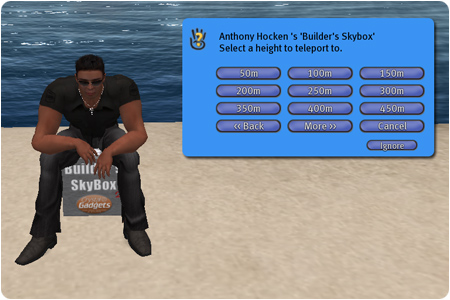
- Step 2:Click the box (you’ll automatically be seated) then select the height you want to rez the skybox at.
- Step 3:Select “Rez Large” to create a 30 x 30m skybox.
- Step 4:You’ll be teleported inside a high precision workspace. This is where you build your masterpiece!
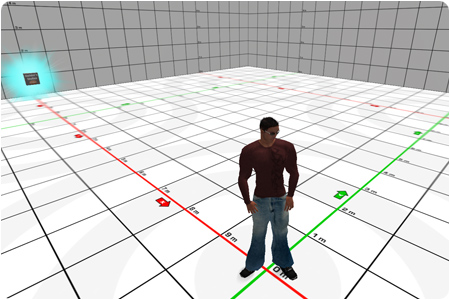
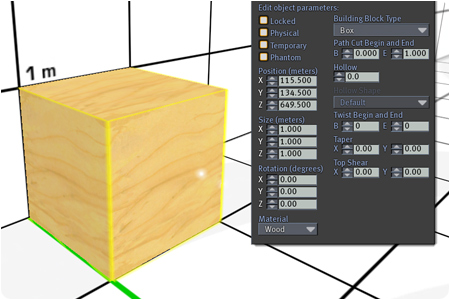
- Note: Notice that the grid is aligned exactly to the world axis. This is helpful for fine adjusting a prims position by its coordinates.
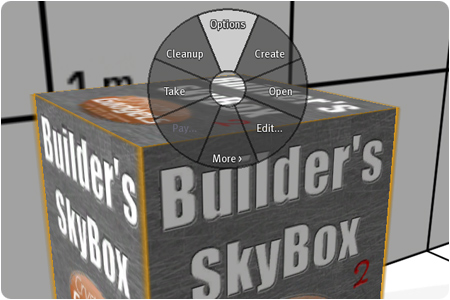
- Step 5:If you want to adjust the grid markings or colours then right-click the rezzer box and select “Options” from the pie menu.
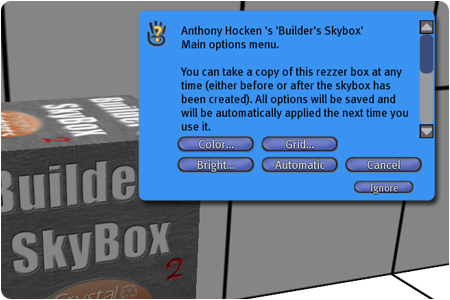
Tip: You can take a copy of the rezzer box to your inventory at any time. The next time you use it to create a skybox the options will be applied automatically.
- Step 6: When you’re finsihed, click the rezzer box and select “Cleanup” from the pie menu. The skybox will be removed and you’ll be teleported back to where you started.
Whats new in v2.0
- NEW: Complete rewrite from the ground-up.
- NEW: New menu system with context help and two-way navigation.
- NEW: Option of two skybox sizes now: 30 x 30 x 20m (42 prims, 5 objects) and 20 x 20 x 10m (16 prims, 1 object).
- NEW: More optimized using the latest techniques. Uses a tenth the total number of scripts now (and therefore less server-side lag).
- NEW: Much higher precision custom textures are used which includes measurement and grid axis markers plus radial markers. All the textures now come in natvie white, black, blue and transparent to suit your mood, each with two grid modes (markings on/off, and grid on/off).
- NEW: Seamless panels. When you change wall/floor colour or turn the grid on/off, the faces between the panels are all coloured to help the inside walls blend together. Very handy if you use it for a photo studio. This is also effective when you change the colour option to Transparent, especially if you have the grid turned off – Unlike version 1 the skybox will appear invisible from inside with zero artifacts.
- NEW: Settings are now saved. You can take a copy of the rezzer box to your inventory at any time. The next time you create a skybox it’ll restore the colours/grid/texture/brightness settings. The settings are stored in the object name so you can see them at a glance in your inventory list.
- NEW: Automated options. You can now teleport to a predetermined height, or create a skybox/platform without having to select from the menu every time. When enabled, simply place the rezzer box on the ground and click it. You’ll be teleported into the sky, the skybox will be assembled, and pre-selected wall/floor textures will be applied, all in about a second! Very handy for optimizing your workflow with zero hassle.
- NEW: The whole skybox now snaps to grid co-ordinates, so the grid overlays perfectly on each axis. Ideal for higher precision building when working by numbers.
- NEW: The rezzer box automatically returns to ground (and informs you) if left in the sky by mistake – though only when the skybox hasnt been created obviously. Plus lots of other tweaks.
Frequently Asked Questions
- I’m using the skybox as a photo studio. Why do my photos appear blurry/smokey?
- Try disabling clouds. Firstly ensure you have the Advanced options visible in your main menu . If you don’t see it then enable it by pressing Ctrl+Alt+D. Then select menu options: Advanced > Rendering > Types > Clouds. I would recommend getting into the habit of doing this whenever you need to take photos.
- Why do the floor markings begin at 5m instead of 0m?
- On the 30m skybox/platform, starting at 0m would of meant that you’d only have the centre 10m x 10m area to play with (when starting at the zero marker) without resorting to creating objects flush up against the wall. With the current layout you have a 20m x 20m area (when starting at the left/bottom-most zero marker) without having to build up against the wall. It also means we have complete radial markers throughout. Think of the 30m skybox as a 20m work area with a 5m margin around the edge to pan your camera around.
- When I select “Cleanup” why are my objects left behind?
- The “Cleanup” option will only remove the skybox/platform itself. You must remember to manually delete any objects inside yourself. It would actually be a security issue if it was possible to do this in Second Life (without placing compliant scripts in those objects).
- Why doesn’t the skybox fall to the ground?
- In Second Life the default behaviour for an object is to stay where it’s positioned at, even if there is nothing underneath or anything to support it. The exception to this rule is when physics are enabled for a given object, but this is practically never the case for large structures like buildings.
- Why not just use a single mega-prim for the whole skybox?
- This would probably be possible (texturing aside), but mega-prims can create undesirable effects in a sim, especially if it’s near the edge of a neighbouring region or if there’s alot of physics going on. Some sim owners sometimes find them handy, but they’re not really meant to be supported throughout the Second Life grid, at least not officially. As a side note, some scammers try to sell collections of mega-prims for huge fees, but they’re freely distributed and easy to obtain.
History
- Version 2.1
-
Added a green colour option. This includes native green textures with grid on/off, and measurements on/off and will also ask you if you intend to use it as a greenscreen and optimize the setup accordingly. The Chromakey values used is ideal for this purpose. This makes the Builder’s Skybox an ideal tool for film makers and Machinima.
- Version 2.0
- See the “What’s new in v2.0” section for all the juicy details. But in short version 1 has been revamped into a commercial grade product. Version 1 will still be available for free.
- Note that v2 is no longer editable because there would have been a much bigger chance of breaking the skybox by mistake.
- Version 1.3
- Original free version without all the eye candy. It’s still available at Crystal Gadgets.
