Texture Atlas
Texture Atlas is a tool to show sub-textures on the face of a prim by calculating and applying the texture settings for you automatically.
This tool supports multiple ways of applying sub-textures to a prim, including selecting the area (both snap-to-grid and freeform selection), double-clicking grid cells and also menu-driven, whichever is best suited for the texture being applied.
Features
- A tool to optimize the loading of multiple textures on your creations.
- Pay less to upload a single texture.
- Easy to use. Put the same texture on many faces/prims then click & drag over the areas you want shown on each face.
- Fast Snap-to-grid mode. Auto-detects grid size & chosen cell in a single step.
- Robust error-correcting algorithm.
- Double-click enabled for cell selection.
- Freeform mode for exact selection.
- Inc. Photoshop templates with guides.
- Inc. sample texture atlas for practice.
Getting Started
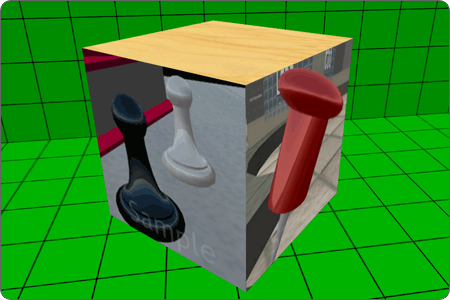
For this example we’ll be using the sample texture included in your Texture Atlas folder. For details of how to make your own texture please see our Photoshop guide.
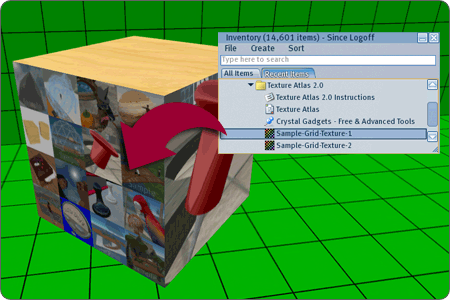
- Step 1: Drag “Sample-Grid-Texture-1” from your inventory onto the face of the prim.

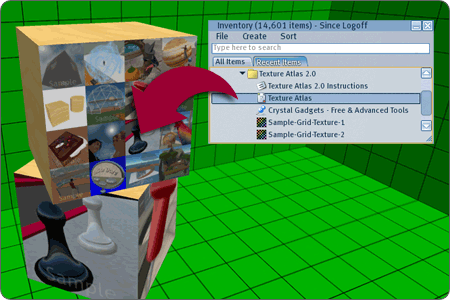
- Step 2: Drag “Texture Atlas” from your inventory onto the prim.

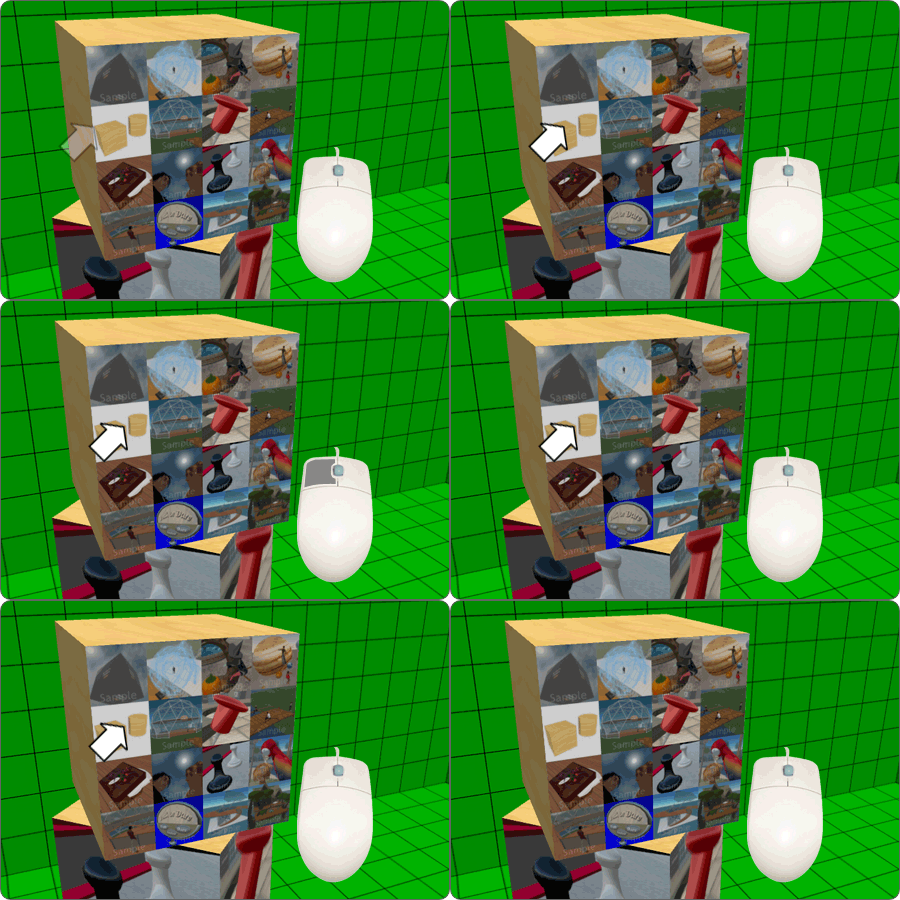
- Step 3: For this example let’s show the sub-texture with the red pin. On the face of the prim, position your mouse cursor roughly over the top-left corner of the sub-texture. Click and hold, then drag the cursor to the bottom-right corner of the sub-texture, then release the mouse button.
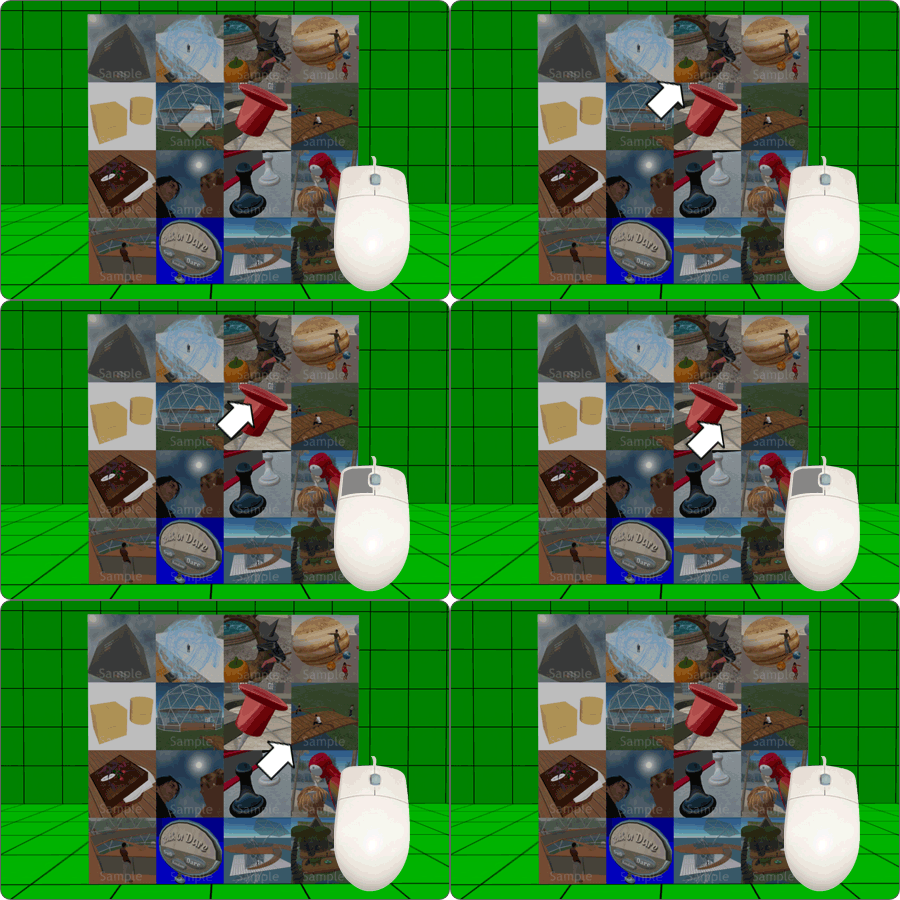
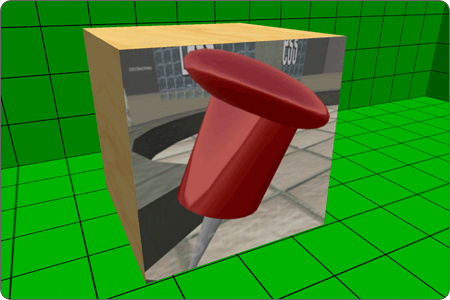
- Observe that the sub-texture is now shown on the face of the prim. The grid properties were calculated for you and the exact settings for the sub-texture were applied even if you didn’t click exactly in the corners.
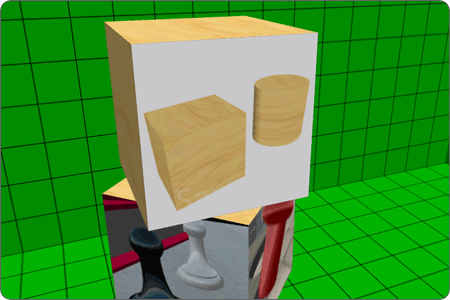
- Step 4: If you want to show a sub-texture on other faces of the same prim, simply apply the texture to the other face(s) as needed then double-click on the sub-texture. It will be assumed that the grid layout will be the same and the texture properties will be calculated based on that. Repeat this step for any other faces on the same prim as required.
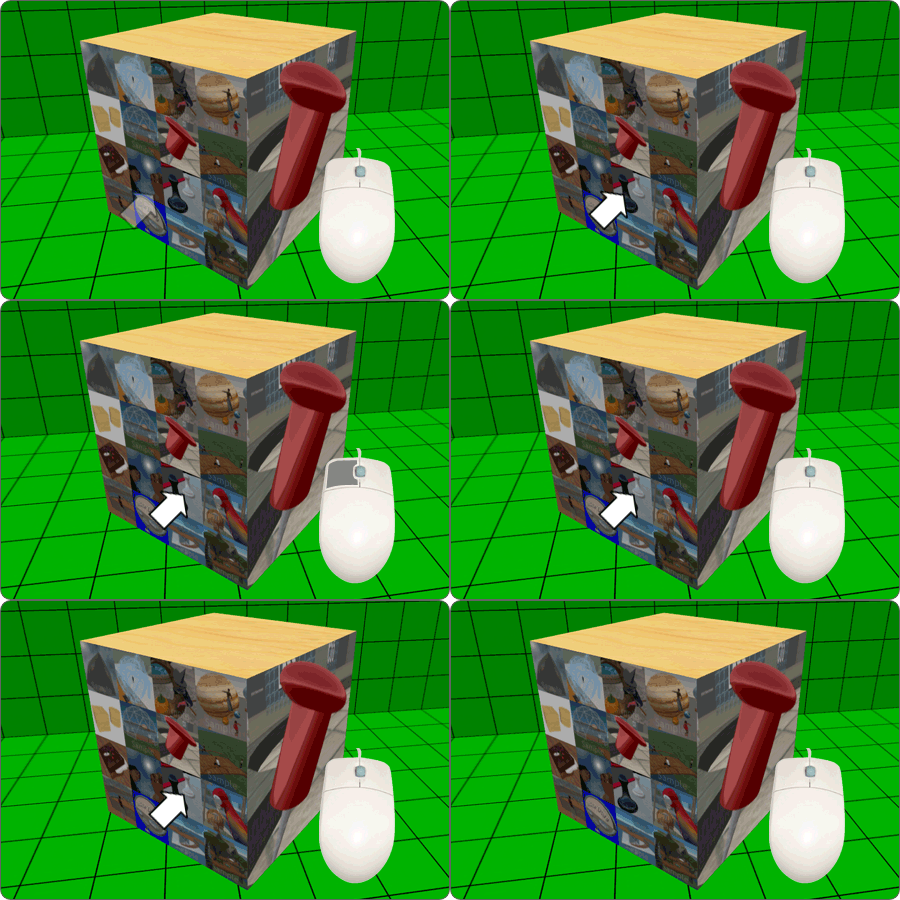
- Step 5: If you want to apply sub-textures to another prim too, drag “Texture Atlas” from your inventory onto that prim. The grid properties/mode will be carried over from the first prim allowing you to continue where you left off. Double-click on the sub-texture(s) you want to apply.
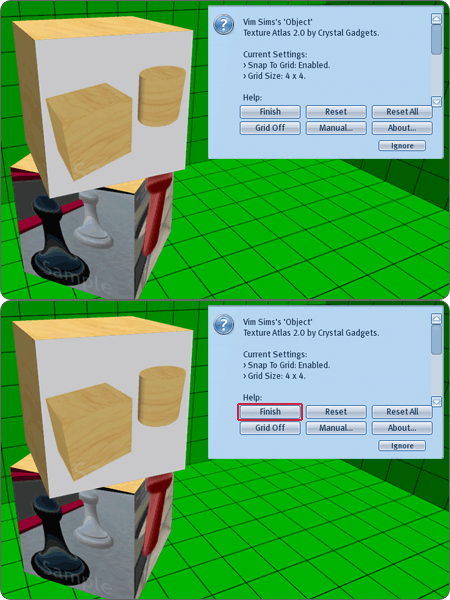
- Step 6: Click the prim and select “Finish” from the menu. The Texture Atlas script will be removed from all prims.
Freeform selection
This example demonstrates an arbitrary sub-texture selection (no snap-to-grid). If you haven’t done so yet, drag “Texture Atlas” from your inventory onto the prim.
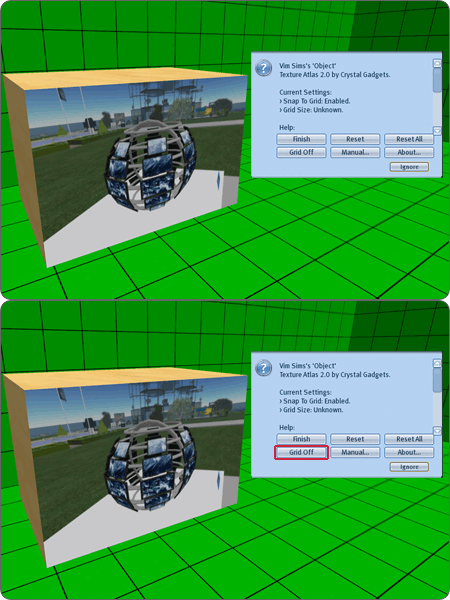
- Step 1: Enable freeform mode by clicking the prim and selecting “Grid Off“.
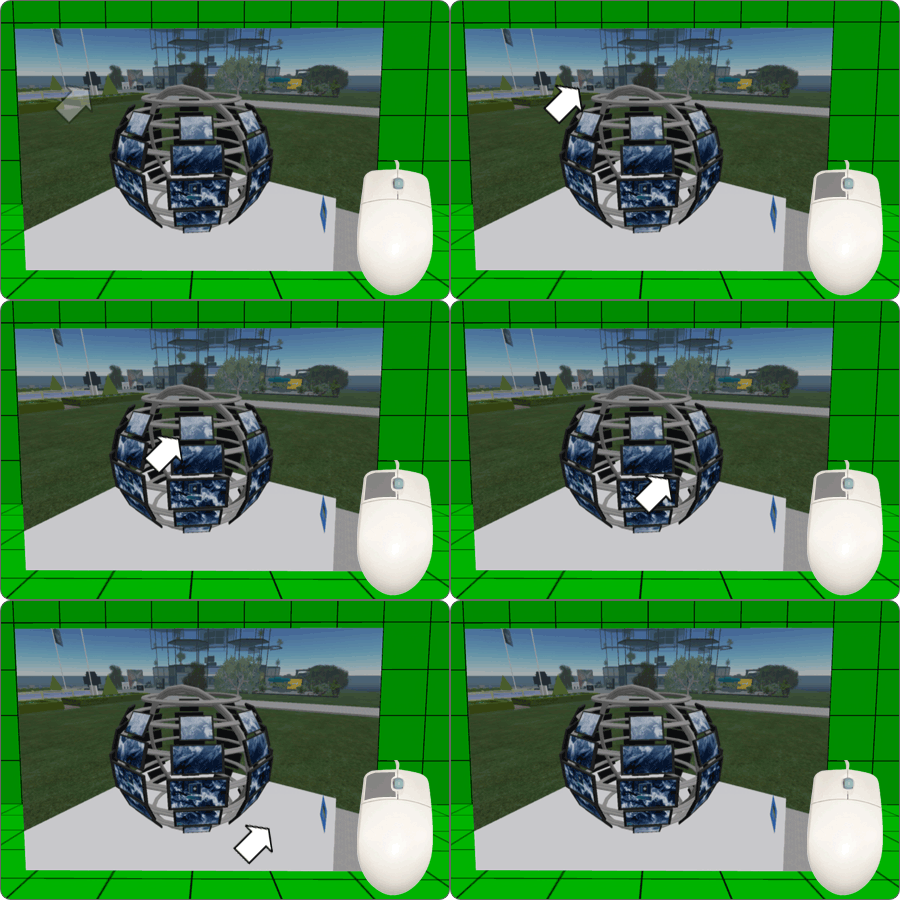
- Step 2: Position your mouse cursor over the top-left corner of the sub-texture. Click and hold, then drag the cursor to the bottom-right corner of the sub-texture, then release the mouse button.
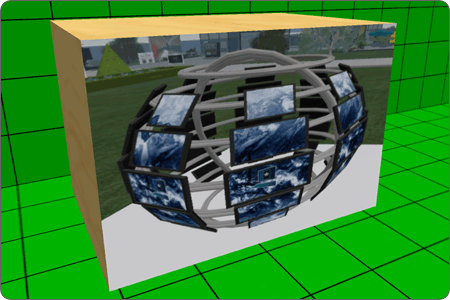
- Observe that the exact area you selected is shown on the face of the prim. If you’re finished remember to click the prim and select “Finish” from the menu.
Overview
Texture Atlas has two main modes of operation.
Mode 1: This involves a grid of sub-textures which you’ve previously prepared in Photoshop or similar graphics software. Using Texture Atlas you simply select the approximate area occupied by the sub-texture and the exact texture settings will be extrapolated for you. We use an error correcting algorithm to determine what you intended. So for example, even if you selected an area closer to the size of a 5×5 cell, if the area/position is closer to a cell from a 4×4 grid then that will be assumed instead. The grid size will be remembered allowing you to deal with other faces by quickly double-clicking on sub-textures. In addition to automatically calculating the texture properties you can also use the “Manual” menu option to specify the grid size and grid cell instead.
Mode 2: The second mode is freeform selection. To activate this mode click the prim and select “Grid Off” from the menu. Then select the area of the texture you want to show and that exact area will be expanded to fill the face of the prim – no snapping to grid will be done. As with method #1, you select an area on the face of the prim by clicking the top-left corner of the sub-texture, drag the cursor to the bottom-right corner of the sub-texture, then release the mouse button. Or you can drag between any other diagonally opposite corners if you prefer.
If you need more accurate freeform selection there is another way of selecting the area. Firstly ensure that the “Snap” option is set to Off, as mentioned in the previous paragraph. Zoom your camera in on the top-left corner of the sub-texture, click and hold for about 2 seconds. Then zoom your camera into the bottom-right corner of the sub-texture then click and hold for 2 seconds. The area between those two points will be expanded to fill the face of the prim.
Frequently Asked Questions
- What is a texture atlas?
- A texture atlas is a texture consisting of several sub-textures, usually arranged in a grid. More details of this technique is on Wikipedia:
http://en.wikipedia.org/wiki/Texture_atlas - How do I make my own texture atlas?
- Please see our Photoshop guide.
- Why bother?
- For some applications using a texture atlas has benefits. Firstly, because all sub-textures are part of the same asset, once one sub-texture is visible to a user all subsequent sub-textures will “load/rez” instantly. So for example if you had one texture consisting of four sub-textures, you could make one of the sub-textures visible from outside your building and the other three sub-textures visible on the inside. Visitors will see the first sub-texture, then by the time they’re inside the building the other sub-textures will appear with zero delay. Another benefit is cost savings. Instead of paying $80 to upload eight textures you can put them all on the same texture and pay $10 to upload it. You should experiment to see which applications are best suited for this technique.
- What happened to the Texture Optimizer tool?
- That has been discontinued. This tool was rewritten/redesigned from the ground up to take advantage of new scripting methods and was renamed to make the purpose clearer.
- How do I undo what this tool did?
- Place “Texture Atlas” in the prim if you haven’t done so yet, then click the prim and select “Reset” from the menu. The texture scale/offset will revert to default values (the texture itself will be left untouched). If you want to undo all the faces on the prim select “Reset All” instead.
- Are there any caveats if I edit the texture atlas in Photoshop after applying it to a prim(s)?
- If you apply a texture atlas to prims(s) then later upload a new version of the texture atlas, you must be careful to apply the new version to all faces, not just the faces where the sub-texture was modified. Otherwise you lose the advantages of using a texture atlas! Or to put it another way, if you upload a new version of a texture atlas you should be careful to ensure the old texture atlas is no longer being used anywhere on the same object.
- Can I transfer/sell the prim?
- Once you have selected “Finish” from the menu you can do whatever you like with the prim. It will only be non-transferable while the Texture Atlas script is inside.

